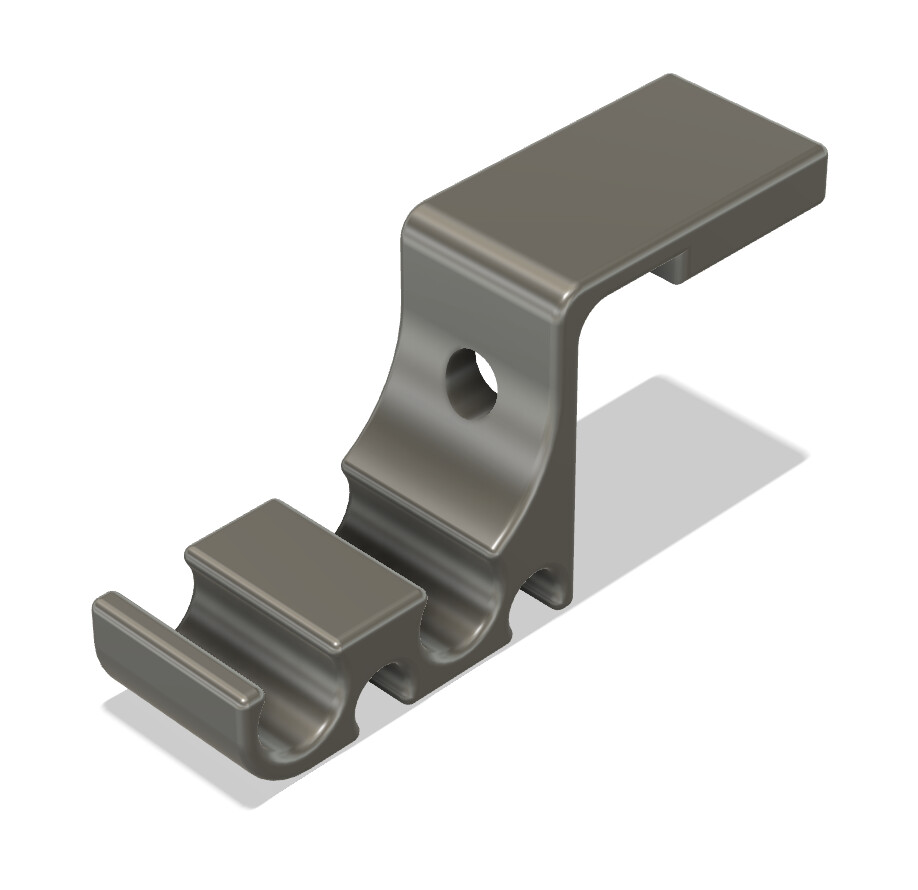
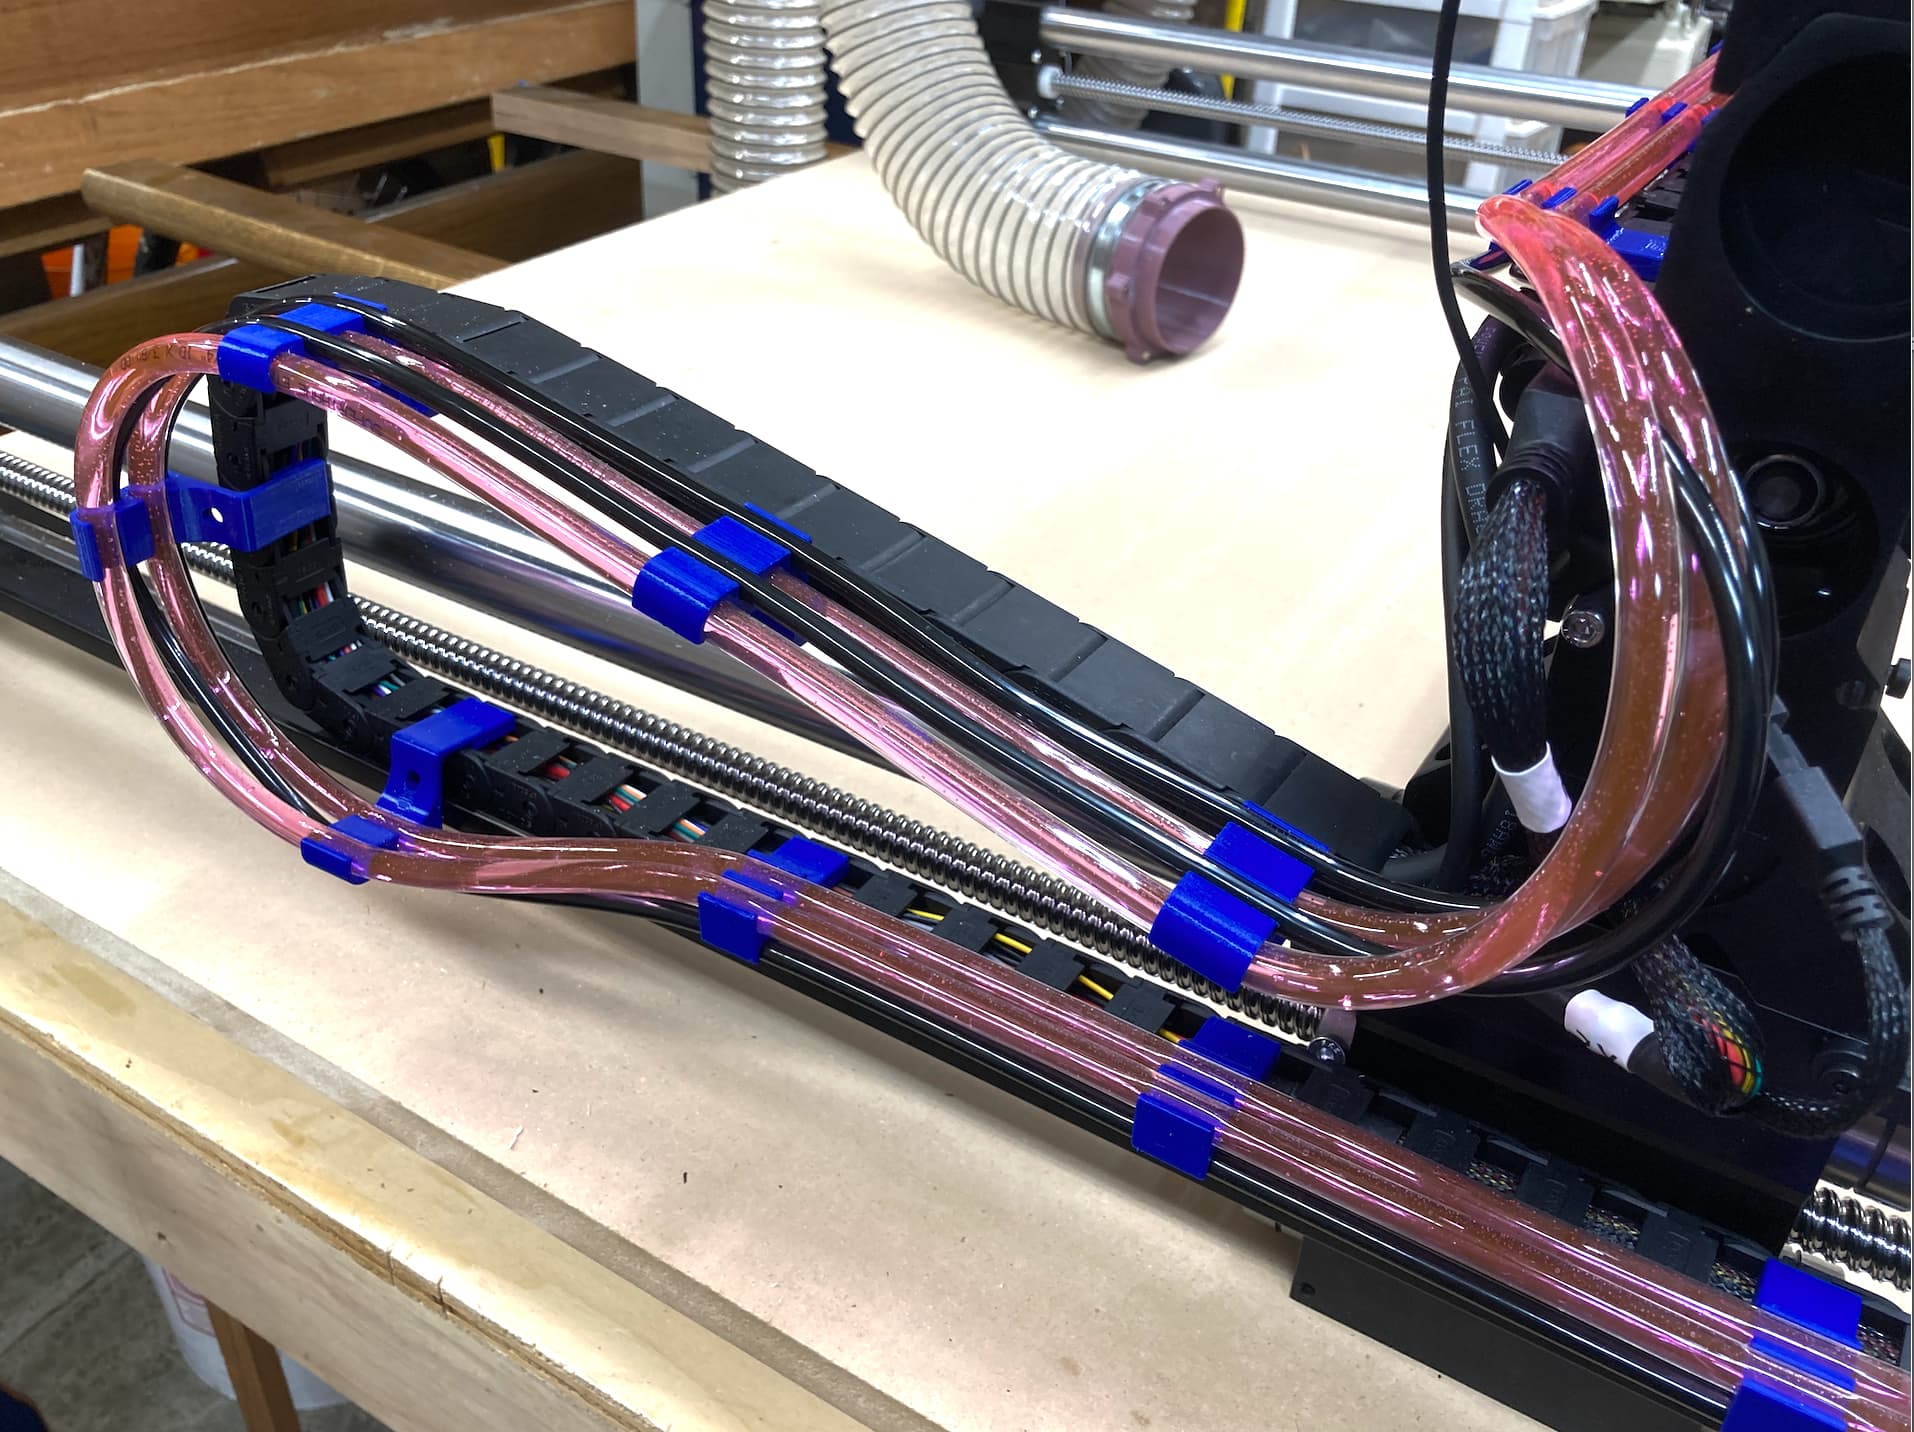
I was looking for a solution to manage the coolant and airlines for my PwnCNC ATC on my Onefinity Elite. A wider drag chain seemed like a good solution. However, it wasn’t a same day solution, so I decided to add clips to the existing drag chain. I’ve seen a lot of clips like these, but I didn’t see any that carried the air and coolant lines.
Insallation
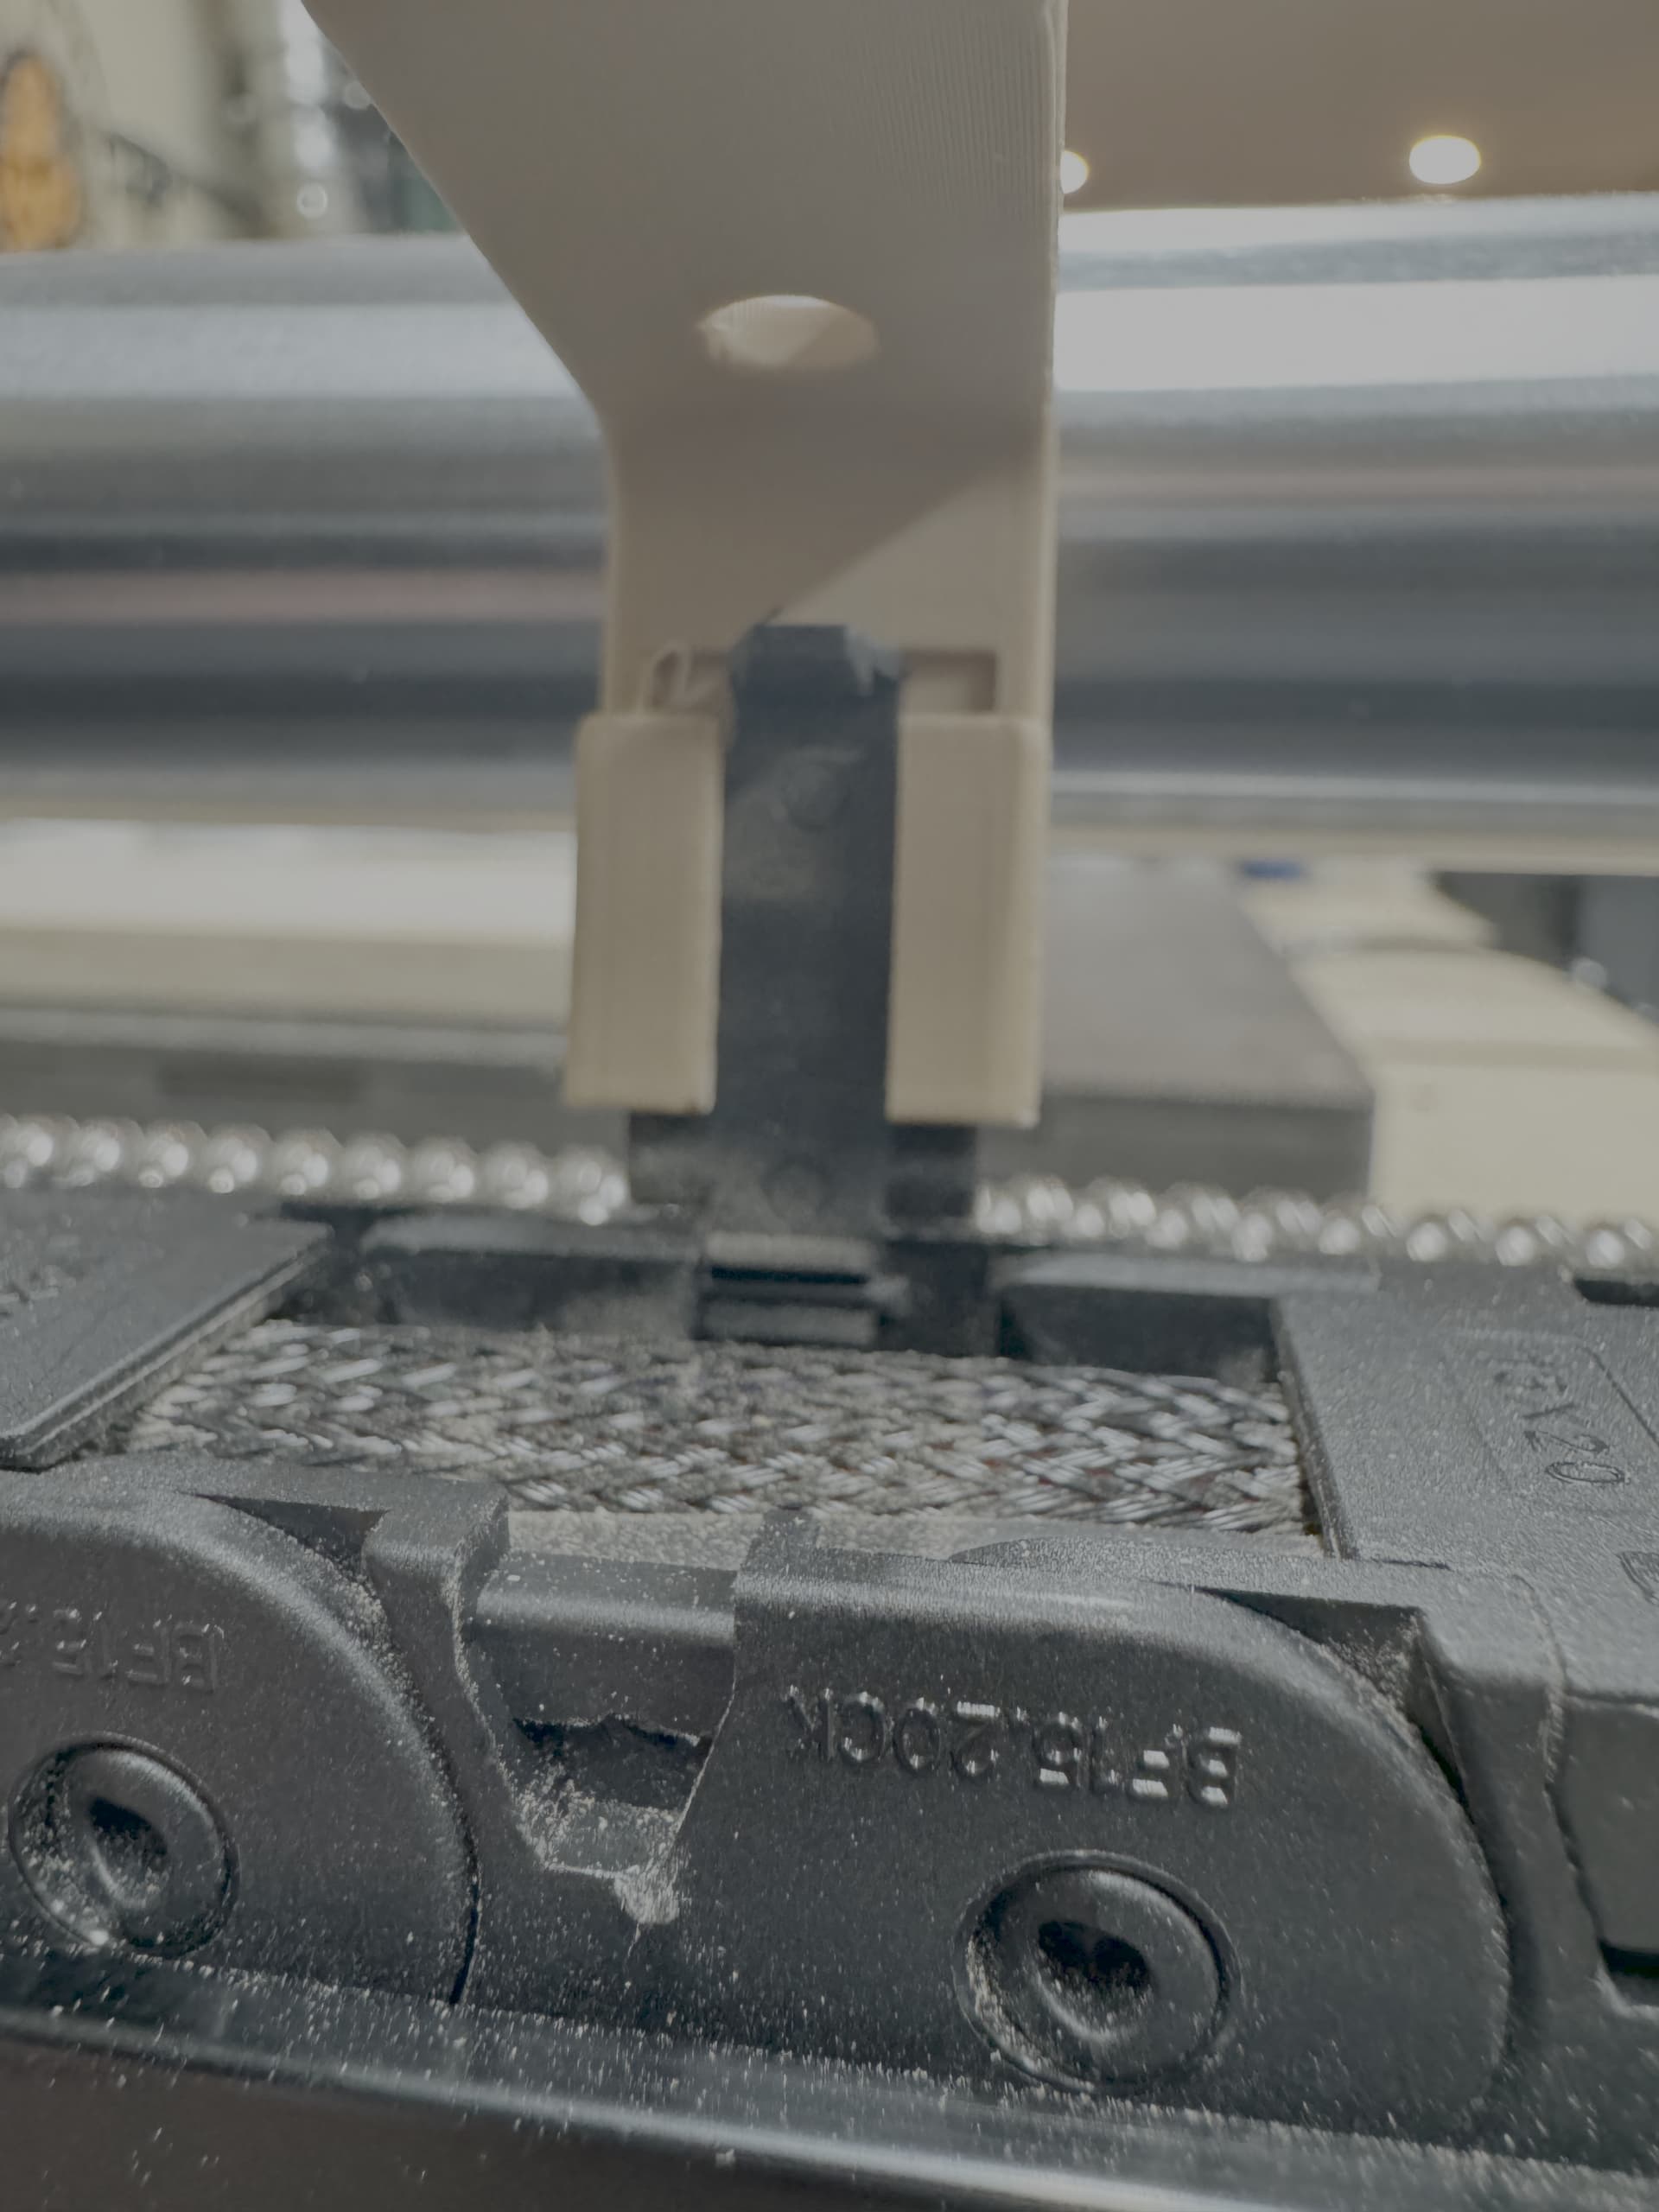
These clips slide over the drag chain covers. Do not lift the clip to open the drag chain cover. Insert a 1/8" flat head screw driver through the hole in the clip and then into the drag chain and then rotate to pop the cover open. Just as one would use a flat head screw driver to open the drag chain cover without the clip installed.
When installing the air lines it is easiest to rest the air line against the corner of the clip and then press down. Rather than laying the airline flat against the clip and trying to press the entire with of the air line into the cup at the same time.
2025-02-16: v4: Reduced force needed to slide clip on to drag chain cover by increasing slot by 0.4 mm. Reduced round over of tube clips from 1 mm to 0.5 mm to increase holding force. Increased holding force is most useful near the end of the drag chain.
2025-02-15: v3.0: Change slot for drag chain door to be completely flat. Added version number (“3”) to side (Drag Chain Clip v3.0.stl).
2025-02-15: v2.2: Increased length of channel for drag chain cover (STL File: Drag Chain Clip v2.2.stl).
2025-02-15: v2.1: Increased margin to front of drag chain cover by 1mm to make latching the covers closed easier (STL File: Drag Chain Clip v2.1.stl).
I’m using the PwnCNC Cable Joints that came with my ATC to route the lines over the top of the Z motor. It is functional for now. I plan on making a support bracket later.
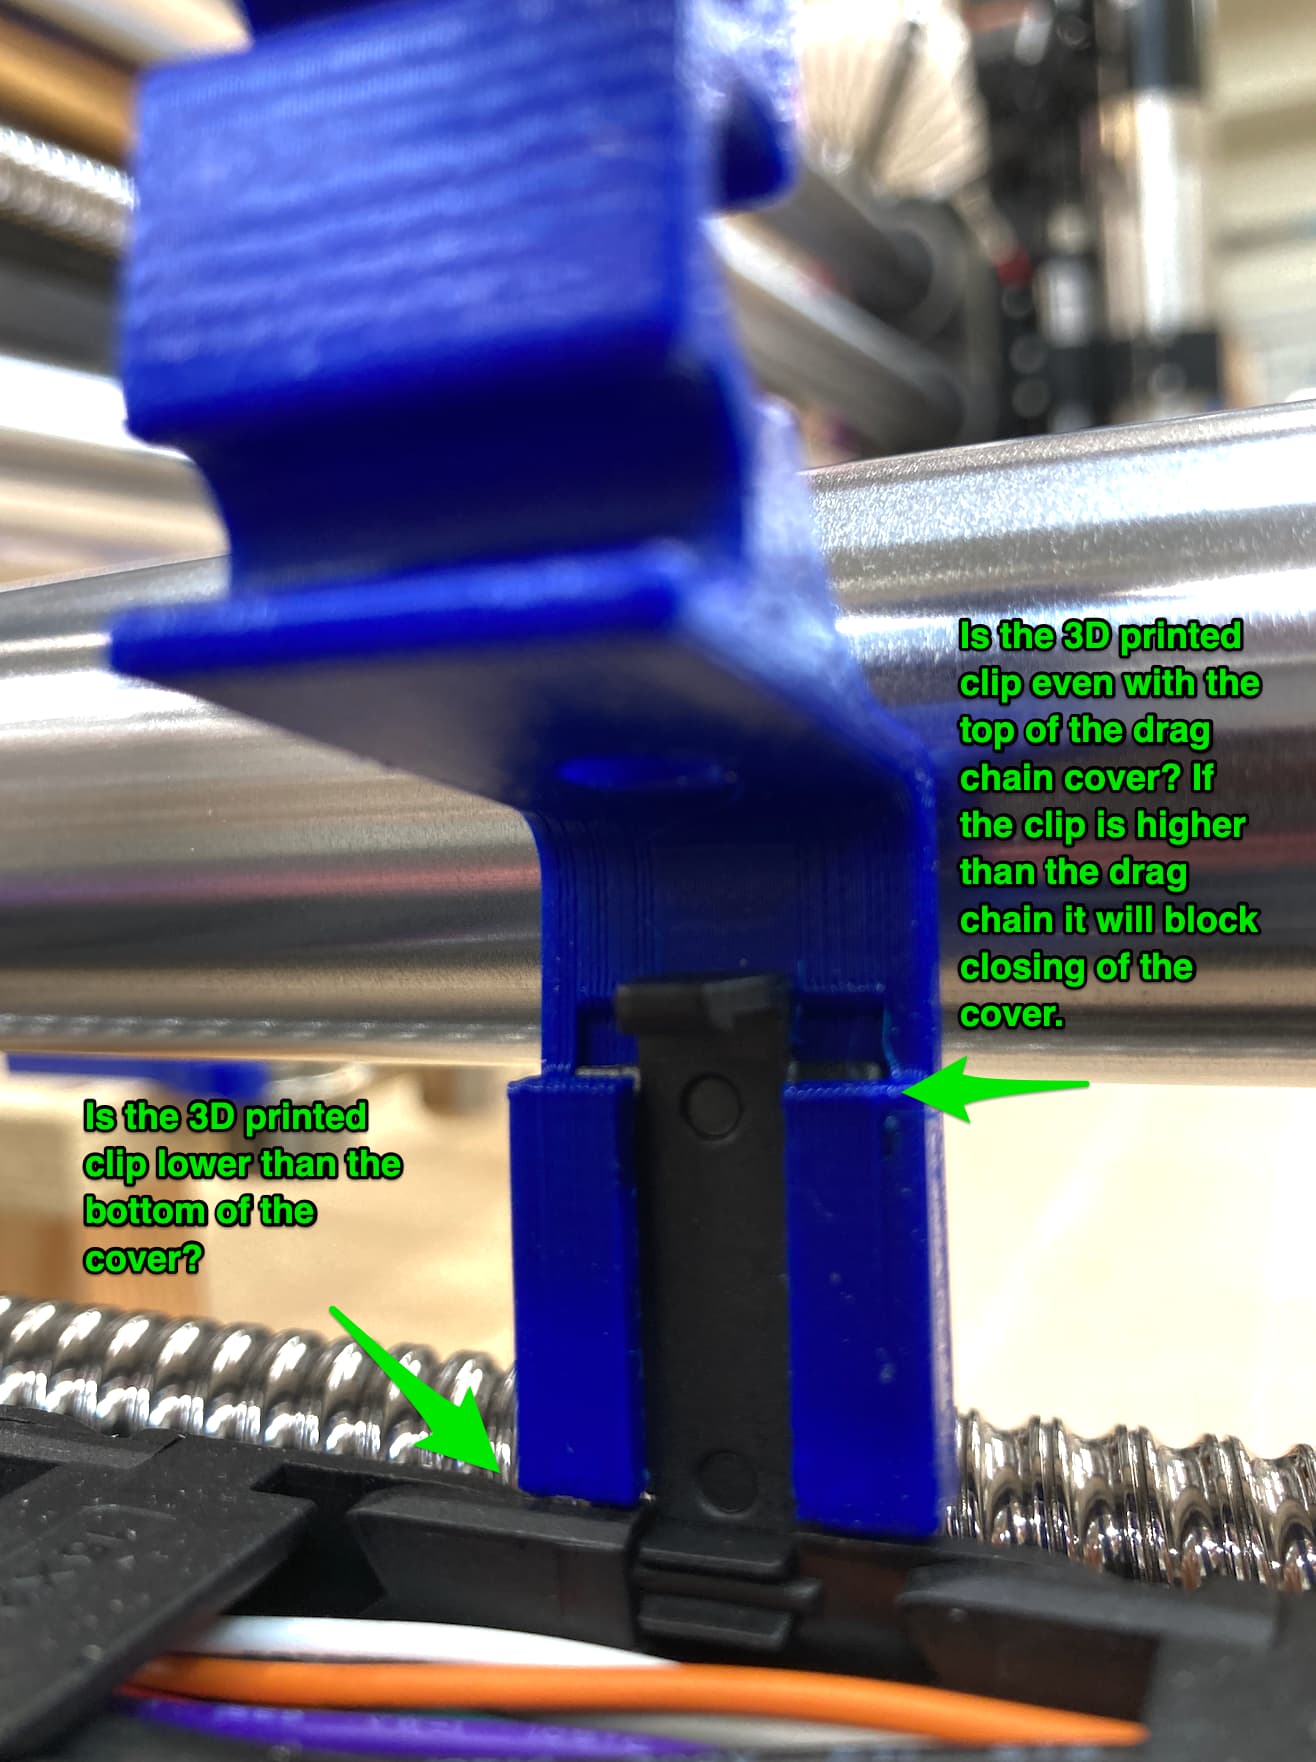
If you have any problems closing the drag chain covers make sure that the 3D printed clip is fully pushed on to the drag chain cover. All of my covers closed. If you have issues please reply to this topic. I can tweak the design if needed.
@Eriz
Thanks Eric. I’ll try again; but, I thought of that and pushed as hard as I thought I could without breaking the drag chain covers. I even cut off a bit of length for the part of your clip that slides over the cover…didn’t seem to help. I’ll try to get more specific information and reply back.
Looking at my clips the align almost perfectly with the cover. See picture below. Please share a similar picture of your clip. I can easily shorten this part of the clip to increase the margins.
Update: Posted v2.1. See first post in this topic.
I pushed even harder and the cover (at the top) slid out of the recess and allowed the clip to fully seat on the cover. The cover then snapped back in place.
I was initially afraid to push hard enough for that to happen. Maybe if you added a “ramp” to encourage the cover to slide out and over the recess lip…???
I think I see the problem. I’m guessing at the distance though. Try v2.2. I added 2mm to the length of the channel for the drag chain cover. I hope this allows the end of the drag chain cover to rest against the end of the channel (as show in your first picture) while keeping the part of the 3D print that wraps around the bottom of the cover away from the sides of the drag chain.
I haven’t printed v2.2 yet. I’ll try it later tonight.
@OSUprop and @MstrODstr, I think I know the root cause of the latching problem. Mine were working by chance rather than design. I’ve updated the design and tested it on my drag chain and it worked well. See v3.0 in the first comment of this topic.
The issue was the recess in the inside top of the clip. The recess should not be there as it causes the body of the clip to prevent the door of the drag chain from closing fully and thus not latching. Thank you both for posting your questions and feedback in this topic. I hope v3.0 works well for you. Either way I’m eager to hear how v3.0 works for you.
@Eriz
Eric, it is ALMOST perfect now. After removing that recess (where the cover slides into the clip) it is now VERY difficult to slide over the cover. To the point I was afraid of breaking the drag chain cover. Is it possible to increase the spacing of the two “arms” that go around the cover? I don’t think it would take much…maybe 1-2mm…basically the thickness of the recess you removed.
This version slides on the drag chain cover nicely for me. I don’t want there to be any slop in the fit, so some force is needed, but I don’t think too much for v4. Let me know what you think.
I also tweaked how the tubes fit in. Previously I had a 1 mm round over, I reduced it to 0.5 mm. The goal was to increase the retention force for the air lines. They can sometimes pop out at the end of the drag chain where tubes bend up away from the clips. This reduction makes the air lines more difficult to install, but I don’t think it is too difficult. The trick is to lay the airline at an angle against the clip and then press down on the airline at that corner. The rest of the air line will follow into the clip as the corner goes in.
Keep the feedback coming. I hope to get the design to the point where it is easy for anyone to use.
@Eriz
Eric…v4 is PERFECT. Went on easy but snug and easily but firmly snapped into place when i closed the cover after putting on the clip…wonderful job.
I really like the look of these clips. Very nice design work. I think they will work great on the foreman. When printing, how do you orient the clip for the best finished product? Which face do you have attached to the print bed? I’m trying to avoid supports as much as possible, thanks.